Showing posts with label Pink. Show all posts

Monday, November 10, 2014

Craft Alert! DIY Elephant Mobile

Baby Turtle recently graduated from the bassinet to her crib. We never intended for her to sleep in it until she was a bit older, but she was out growing the bassinet way too fast. I didn't get her a mobile for the crib for that reason. I wanted to be able to find the "perfect" one and buy it. So doing some research, the "perfect" one was crazy expensive! Like $40 to $90+ expensive. So with the help of some Pinterest, I decided to make my own for half the price. I used three pins combined to create my own piece. One for the layout, pattern, and structure
 
I didn't get a chance to sit down and knock this project out in a few hours. Baby Turtle wouldn't have it. I ended up fitting this project in between naps and after Baby Turtle went to bed over the span of a week. The only thing I waited for Hubby to be able to watch her for was the parts that involved the hot glue gun. I didn't want to risk a) accidently leaving it on if she were to have woken up b) get halfway though a hoop and have her wake up c) hot glue and babies don't mix! I think if I were to total all the time I spent, it would be about 8-10 hours. Maybe? I stopped and started a lot since Baby Turtle doesn't have a real set nap schedule yet. Naps last anywhere from 15 mins to 3 hours, depending on her mood.
 
This DIY project is fairly low cost compared to the customizable ones you find on Etsy. I pictured the materials I purchased (all for about $13) and the non-pictured items I list are things I had at home.
 
Materials:
 
2 Embroidery Hoops. I used a 12" and a 7". You will only need the solid wood part, not the part with the hardware on it. (Keep it though! I plan on testing out another DIY with that part so money and materials aren't wasted)

Embroidery Floss, use colors that coordinate with the felt. I got pink, grey and cream.

1/3 yard each of pink, grey and white felt. (I got mine at Jo-Ann)
*If you can, get felt sheets instead. I learned that 1/3 yd of felt was just excessive and I only used about 1/8 of each sheet*

Matching Yarn (I used pink) and white thread

(Optional) elephant hole punch, I borrowed this from a friend
 You will also need the following:
Cardstock
Sharpie
Tape
Hot glue gun & sticks
Large needle
(optional) Stuffing
(optional) grey cardstock

Directions:

-part one-
1. Make your stencils. I free-handed my shapes, cut them out and taped the flap closed. You'll need the elephant shape, ears, and clouds.

you can tell I was quite indecisive about my shape :)

To save paper and get a good proportion for the ears, I used the elephant cut out as the stencil

Ta-Da!

I decided to make 3 different cloud shapes to add some dimension to the overall look 
2. Trace out your shapes onto the felt and cut them out. You will need 6 pink elephants, 10 pink hearts, 6 grey elephants, 10 grey hearts, and 20 clouds (make sure you have an even number of shapes if you use multiple ones). Also make sure that you trace an even number on each side of the stencil, so you don't see the marker on one side.


Note how I traced elephants and hearts facing one way and vice versa?
 
This was the moment that I realized 1/3 yd felt was WAY too much. This took up *maybe* 1/8 of the whole strip of fabric.  

Even though I had made 3 different clouds in my stencil, I decided that the two larger ones would look better than all three. Get creative!
3. Sew the hearts onto the elephants using the embroidery floss that is the color of the elephant. I alternated the colors (grey elephant with pink heart, pink elephant with grey heart). Make sure that for every two pieces of elephant, you sew the heart on the opposite side. (they will eventually get sewn together and you want the hearts facing outwards.) Use the same colored thread to make the eyes. I made a simple X, but you can be as creative or non-creative as you want :)
 
I used scissors to stuff my ears. Totally optional, but I think it adds more dimension to the overall piece.

Close up of the finishing stiches
 
This is what the back side of one side of the elephant looks like.
4. Sew the elephants together. I had leftover stuffing from a pillow I made, so I used it to give my elephants some dimension. I laid some stuffing inside before starting to sew. At the end, before I closed it up, I checked the stuffing and added as needed.
 
Finished elephant nose on

Finished elephant side view
 

5. Sew the hearts together using the same colored embroidery floss. Stuffing is optional.

6. Sew the clouds together using the cream embroidery floss. Stuffing is optional.

7. Now you should have 3 pink elephants, 3 grey elephants, 2 pink hearts, 2 grey hearts and 10 clouds. Set these aside.

-part two-
1. Take the embroidery hoops and separate the pieces. You only need the solid wood pieces.

2. Carefully put some hot glue on the inner rim and start wrapping the yarn around. Take your time, wrapping the yard very tightly. Also be careful, the hot glue is, well, hot. :)


3. Wrap both hoops in yarn.

-part three (optional)-
1. Cut out lots of elephant shapes using grey paper. I would use pink and grey, but the hoops are already pink. I didn't want it to be overkill on the pink. I just cut as many as I could on one 8"x11" piece of grey paper. I punched around the entire border of the paper, cut the outlines out and continued on until there was no more paper.
I hope this shows what I mean in the instructions :)
Elephants!!

-part four-
1. String some thread through the felt shapes. Tie knots at the top and bottom of each shape to keep them in place. Be as creative as you want with where you want the shapes to be :)

2. Tie them onto the hoop. You can get a ruler and measure it, but I just eye-balled it with no problems. I put the elephants on the larger ring and the hearts on the smaller ring.

3. I used some yarn and tied the two hoops together, keeping the smaller hoop slight lower.

 
4. Use more yarn to tie on the larger hoop to use as the hanger.

I took 4 equal pieces and tied them all together in a knot on top

5. If you did part three, use a small dab of glue and place them on the hoops.

6. ALL DONE! Hang and enjoy!

The Finished Product!

this is what baby turtle will see lol. should've made them more 3-D


Wednesday, October 22, 2014

Wic Wednesdays #3: Teriyaki Chicken (Freezer Friendly!)

This teriyaki chicken recipe is super easy to prep and even easier to cook! I got this recipe from Kojo Designs but I altered the recipe a little. Her teriyaki chicken only calls for broccoli and I added green peppers to the mix. I also reduced it down to 3 chicken breast because our grocery stores sell them in groups of 3 not 4. Be careful when you place in the freezer that you don't place anything too heavy on top or it will puncture the foil. That's why I used two pieces of foil.
 
Ingredients:
3 Chicken Breast
1 green pepper, chopped*
1 head broccoli, chopped*
1/2 cup honey
1/2 cup soy sauce
1/4 cup water
2 tsp ground ginger
2 tsp garlic, minced
1 foil pan
foil

Directions:
1. Lay chicken breast, bell peppers and broccoli on the pan
2. Mix the honey, soy sauce, water, ground ginger and garlic together.
3. Pour mixture over ingredients in pan.
4. Cut 2 pieces of foil out to fit over the pan. On one of them, in the center, write: Bake at 350* F for 20-30 minutes covered. Uncover and bake for 20-30 more minutes.**

To cook:
1. Defrost in the fridge the night before.
2. Bake as directed. Cut into the chicken before serving to make sure it's thoroughly cooked. Pink is bad!

Some things I would do differently:
**This recipe was a half success. The chicken was cooked amazingly. But I had to bake it for an extra 30 mins uncovered. SO, I would change the instructions to uncover & bake for 1 hr.
Another thing I would do is not use the same veggies. The green bell pepper turned out to be really bitter/sour and the broccoli kinda just soaked in all that taste. So the chicken was amazing, but the veggies...not so much. I would steam them on the side or put them in fresh the day of. I think freezing them like that did a number to the poor things.


Thursday, July 31, 2014

Baby Turtle's Room Tour!

**NOTE: This was written before I had baby turtle. I have since then edited the room to function for us, which should be upcoming in a post at some point. Time is pretty valuable right now, story of a new mom's life**

Welcome to Baby Turtle's Room! It took me about 6 weeks to actually get it to this point. Thank goodness for nesting lol. I blame any time delays on bladder breaks and munchies breaks! My idea for this room was pink and grey chevrons with elephants. HOWEVER: I did not realize that baby stuff is ~expensive~. So my next resort was to buys bits and pieces and hope they all match ;)

View from the door
I have a toy box that I want to put under the window but it needs some major TLC. I want to paint it a solid white and somehow get baby turtle's name on the top. But this will be a post-partum project. Just like the baby furniture. I wanted to paint the baby furniture white with pink accents. Like on the bars of the crib, top of the changing table and insides of the drawers of the changing table. But being 8 months preggo at the time I decided this, I knew it wasn't going to happen. And Hubs works all day. Sad face.

Left Wall

This is the action wall. Fashion, diapers and hampers. All in one central location. The main reason the big gorilla box is there is to act as a stand for the diaper champ and hamper. I bought the diaper champ off of someone and didn't realize how short it was. (It maybe hits my hips on the ground. No one has time to wrestle a baby and dirty diaper at the same time!) And the hamper is from Target's Dollar Spot. I figured, with as little as baby clothing is, this could easily accommodate baby turtle's laundry. *fingers crossed for preggo logic working*

Mini Station #1: Small trashcan, Diaper Champ, Hamper all on
top of a gorilla box full of stuffed animals. (Confession: they're
all my stuffed animals that I'm "giving" to baby turtle. Here's to
hoping she wont destroy all of them lol)

I made both the bow holder and headband holder long before I even contemplated making this blog. But in all seriousness, it took me like 5 minutes to make the bow holder and 10 minutes to make the headband holder, only because I had to  individually glue on the clothespins! If life allows me, I'll recreate these projects and post about them :)

The wall of hair~! Most of the headbands were a gift at our baby
shower. The bows were purchased from Hold The Confetti and
the flower clips are from Miss Maddies Closet. The other random
ones are *confession* mine that I've passed to Baby Turtle.
We didn't buy too many NB sized clothes. Figuring that newborns grow up in a blink of an eye, more of the purchasing focus has been on 3+ month sized clothing. This drawer pretty much contains all of her NB clothes, minus the few that are in her diaper baskets in the living room, our bedroom, and hospital/diaper bag. And we're in Arizona. The chances of her needing to go outside and actually wear clothes are very limited. Like doctor visits and possible a visit to work to show off her cuteness once. If I don't want to be in the heat, I'm pretty sure she won't want to be either!

Drawer #1: Clothes!

Drawer #2: Accessories? The left side contains baby leggings.
There are always coupons/promos going on that site! That's why
I have so many!The right side mainly has burp cloths and bibs.
I stuffed her hats there too  

Drawer #3: Blankets!

Hubs and I are going to try our hand at cloth diapering. Since newborns are so small but grow so quickly, we got mainly prefolds and covers to last her. I got my covers and prefolds at Kelly's Closet. They are always having some sort of coupon/promo that makes it even harder NOT to buy cloth diapers! I also bought a couple of NB pockets, mainly because the store I stumbled upon was having a closing shop sale. $7 for a NB pocket diaper with insert? Heck yes! Her diaper baskets in the living room and our room look pretty much like this but about half the size plus a few outfits for the inevitable spit up.

Drawer #4: Diapers! These are some of her prefolds, covers,
NB sized pockets and fitteds. And the random Snappi that's just
chilling on top of it all.

We also plan on using cloth wipes, but not until we finish all the Honest Company wipes that I had already bought and the Huggies wipes that we got at our baby shower. Why waste them?

Drawer #5: Wipes! We got these wipes at our baby shower :)

My "First Aide Station" has all of my aiding needs. Medicine dispensers, 4-in-1thermometer, nose sucker, etc. It also has my extra baby supplies at the bottom. I stuck all the things I plan on using on top for easy access. My fluff stash (aka diaper stash) is relatively small compared to most. The top two shelves are diapers. The top is for non-pocket diaper types (A1O, A12, fitteds) and the bulk of the stash is pocket diapers. I bought most of mine off of Zulily whenever they would have cloth diaper sales. The third shelf has extra inserts that I've bought or been given. Don't mind the little egg shaped thing that's just chilling there. It's a dehumidifier, to suck out moisture around the inserts so they don't get all mildew-ey or moldy. And funny enough, right below that is an actual humidifier.

(Right)The First Aide Station: A lot of it is
comprised of Honest Company products.
(Left) The Fluff Stash! This will need it's own
post lol. So much fluff!

Her crib. We don't plan on letting her sleep in the crib overnight for a while, but it's all set up and ready to go. For the meantime, I stuck her extra stuffed animals in there to fill the empty void.

Her crib corner :)

Close Up of the Art Work from Sweet Melody Designs
I had to get this set from her! The picture in the top left corner
was the inspiration for the whole theme of the room:
Pink, Grey, and Elephants <3


Close Up of the Art Work from Around the Block AZ
I had this customized with the pink and grey chevrons in the
background. I love this quote!
 

Some special stuffed animals. The large elephant, Hubert, was a
gift from my dad when I left for the Air Force. The teddy bear
was the first plushie Hubs won me when we were dating,
affectionately named Teddy Bear lol. The big turtle is baby
turtle's first gift from her uncle in NC. The little turtle
and the yellow spotted dog are a gift from her grandma in NC.

Her closet is more so a place of storage.

Baby turtle's closet! Most of it's stuff that
she'll be too small for or mommy tools :)

Her book collection!


Saturday, June 7, 2014

Craft Alert! Customized 12 Month Picture Frame

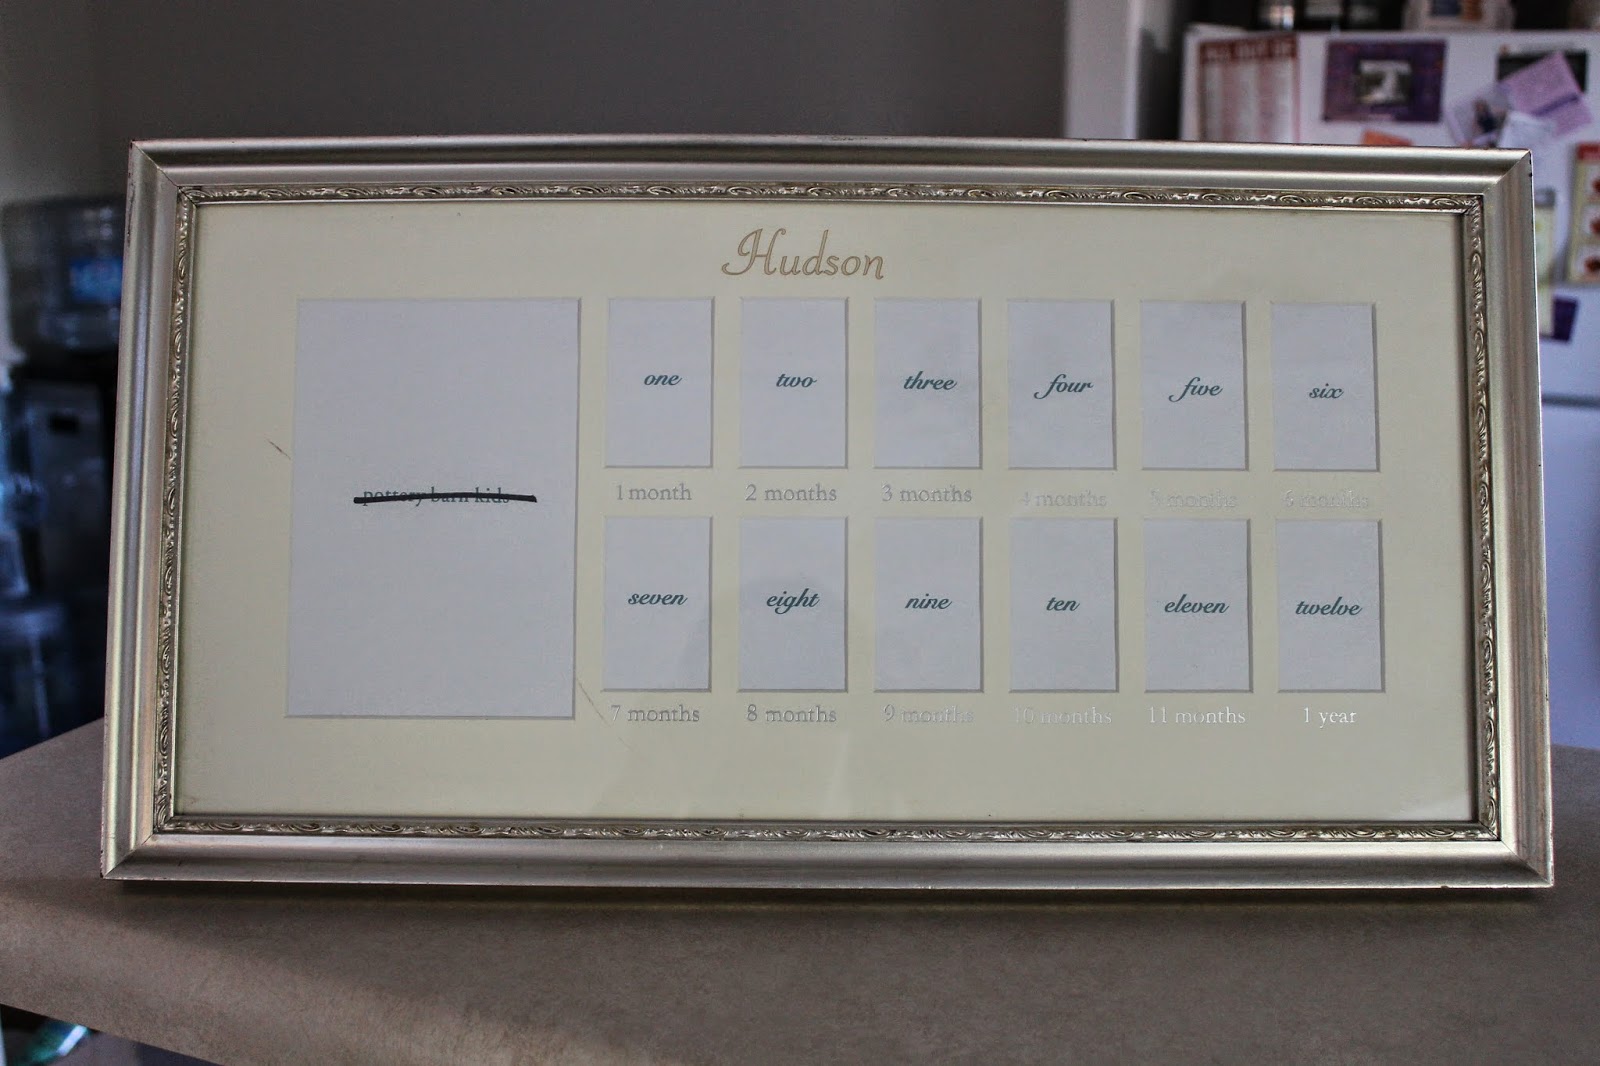
So I bought this Pottery Barn Kids 12 month picture frame off of a Facebook Swap Page for $7. But I didn't realized a few things. First, it had a name pre-printed on it. Secondly, there were some marks on the matting that I didn't see in the post. But I already bought it and didn't want to go through the hassle of either returning it or trying to reselling it. So I had to get my creative juices flowing!

The original frame


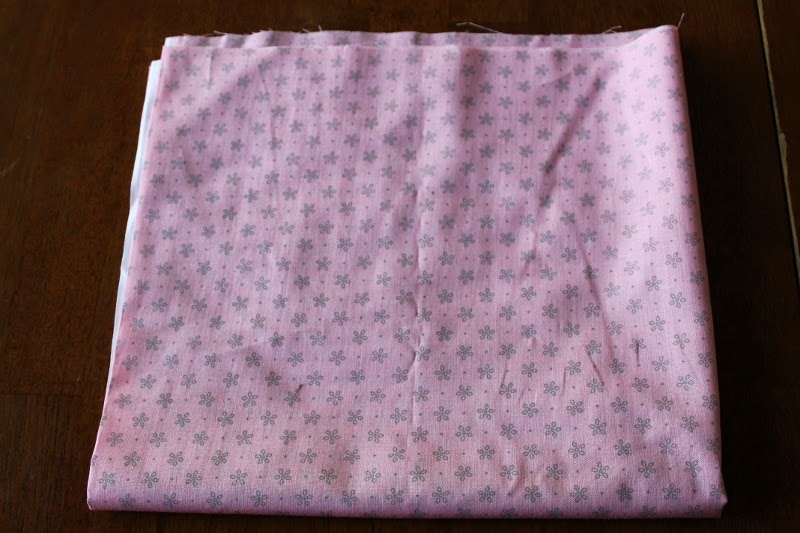
Jo-Ann was having a sale on some fabric and I found a really cute print that would match the color scheme of baby turtle's room. (Pink and grey) I got half a yard for $0.67! What a steal!! I was contemplating just getting a quarter yard, but I figured it would be good to have extra for mistakes. When I got home to measure and check, I found I had enough to cover the mat twice. Perfect! And I already have an idea set in mind for the extra fabric...if I don't mess up the first time :)


The fabric is a light pink with grey flowers
 
 
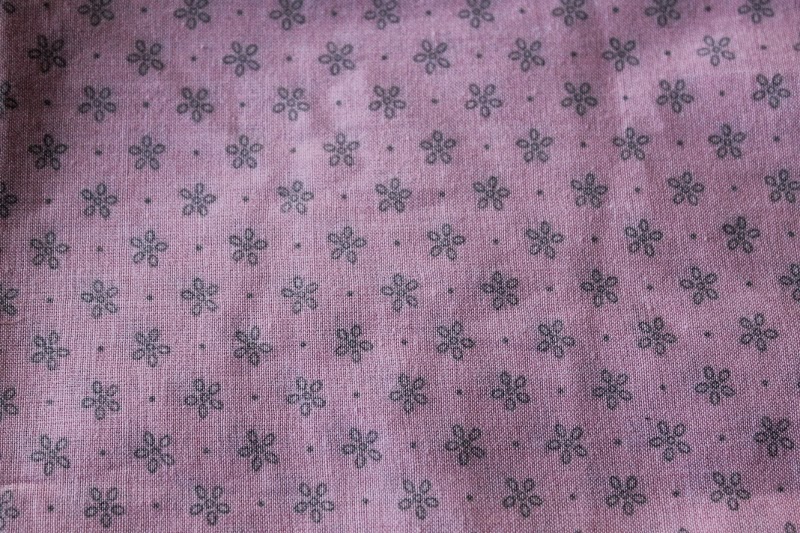
Close up of the print
 
 So the other materials I used for this project are:
* Scissors
* Pencil
* Scotch Tape
 
Steps:

1. Lay the mat on the fabric, face down. (Optional, you could iron the fabric before starting. I kinda forgot to until it was too late)


2. Cut around the mat, giving yourself about 1 inch of excess fabric. This doesn't have to be an exact measurement, it's all going to get tucked away and hidden from view. You just want enough to be able to fold over the mat and secure down.


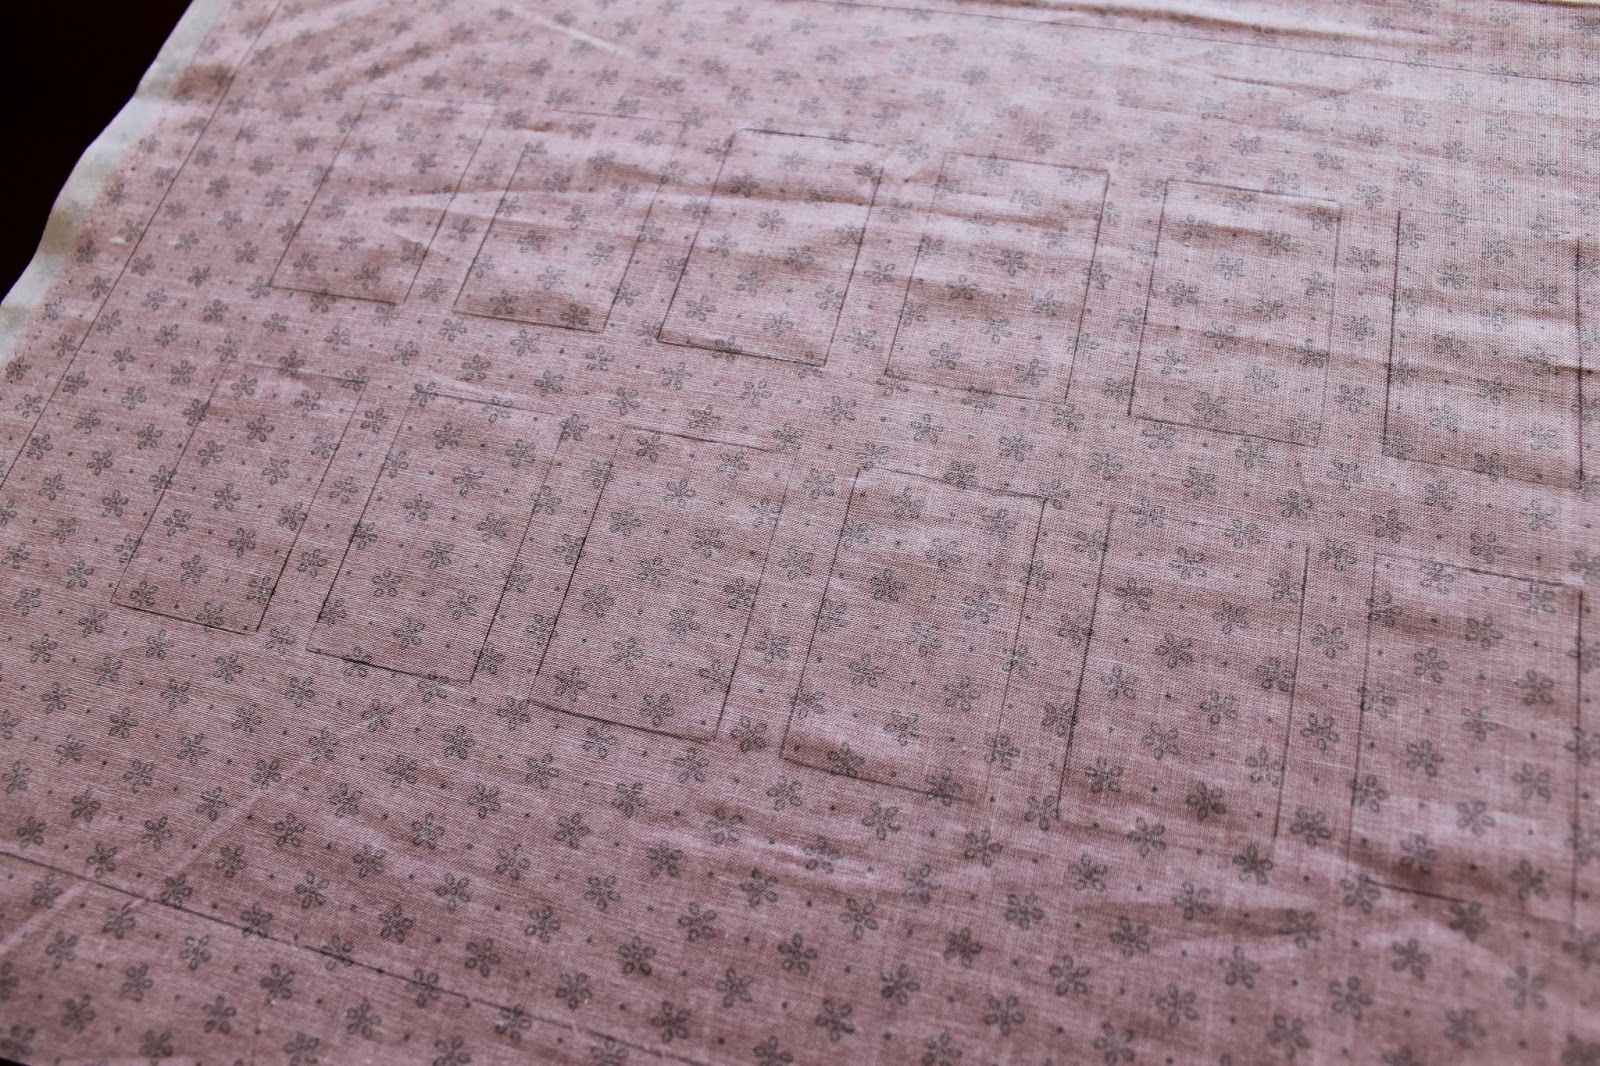
3. Using a pencil, trace the mat onto the fabric. You could also use a pen or marker, but make sure that it doesn't bleed though the fabric. All the pens and markers I had bled though, so I resorted to the trusty pencil.

You can barely see it, but there are penciled in squares!


4. From the corner, cut to the corner of the traced mat outline.

 
  5. The next few steps are going to be fun 3:) First, cut an "X" from corner to corner of the largest traced square. I did this by snipping a random cut in the middle and working outwards from there. Try not to go past the corners marked if you can't avoid it. Repeat this for all the little squares. Remember, patience!

The biggest square is always the easiest


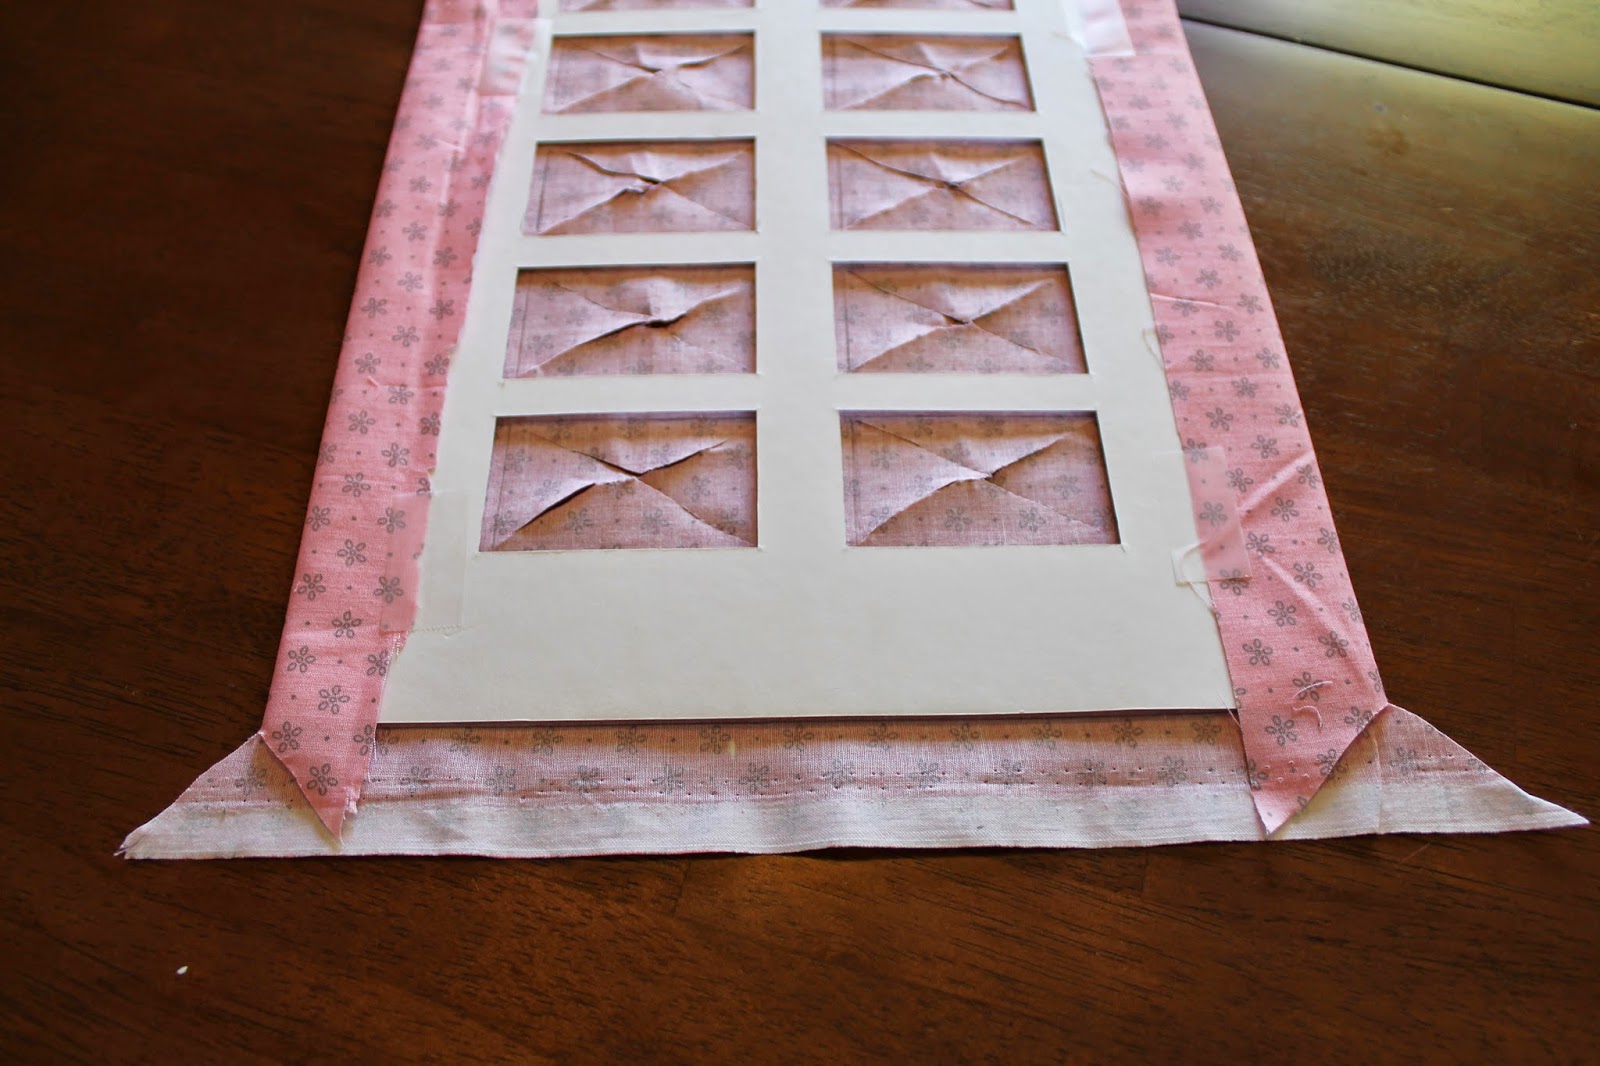
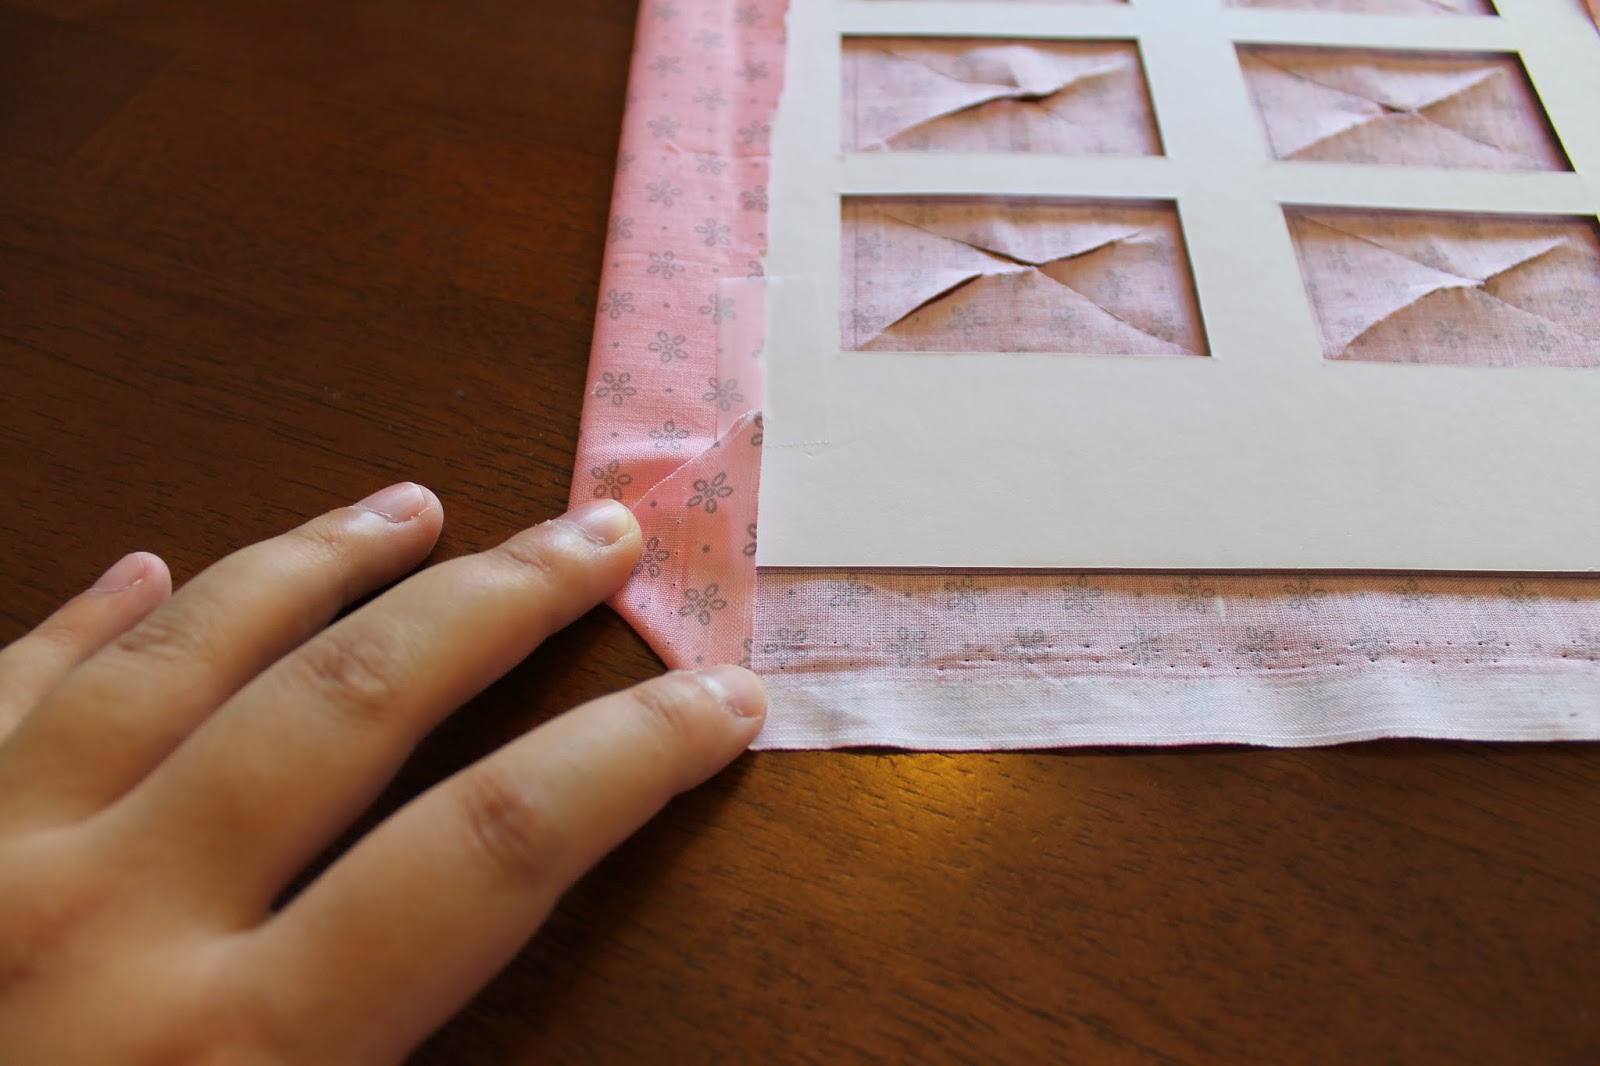
6. Lay the mat on the fabric, lining up the traced lines as close as possible. Start by folding in the outer edges and securing them with tape. For the short ends, this is what I did:

Long sides are folded over and secured.

Take the corner that's sticking out and fold it inwards.

Fold over the entire edge and secure with tape.

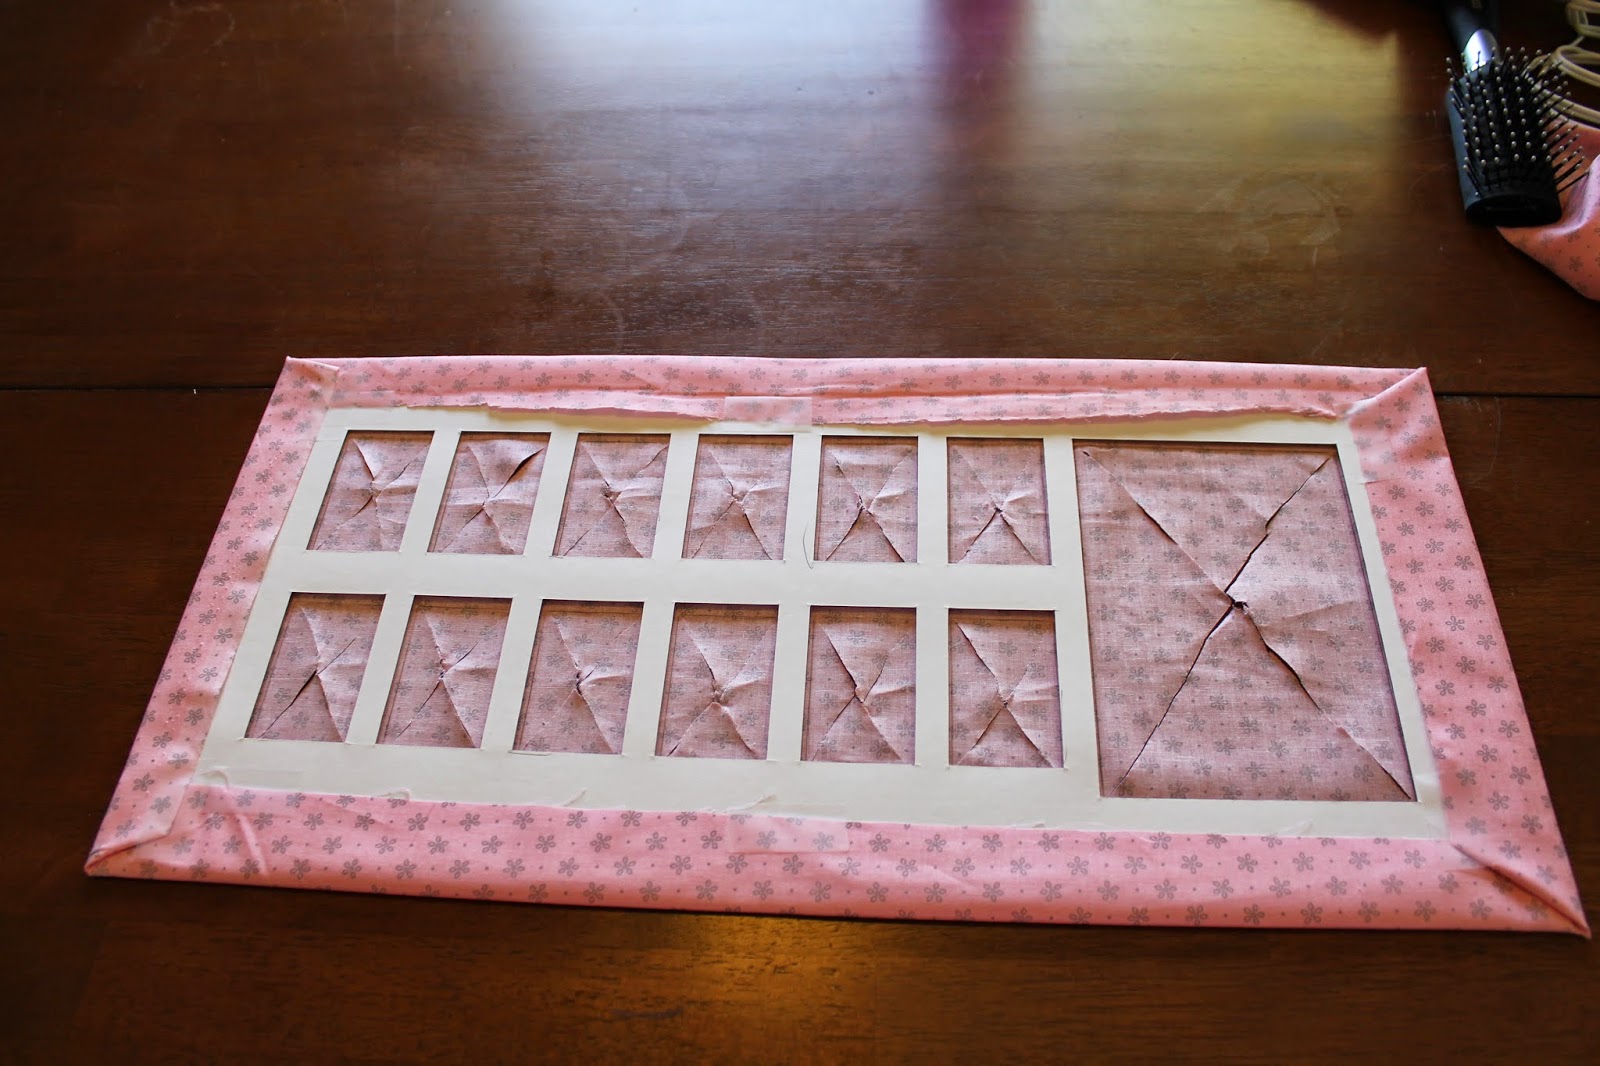
All outer edges secured!

7. Next step is to tackle the individual squares. My method of attack was to fold over the triangles that would fit into the frame without cutting. For the big square, I just folded the triangle in. I just taped the triangles down.
I folded the triangles since there was room to fold/tape them.

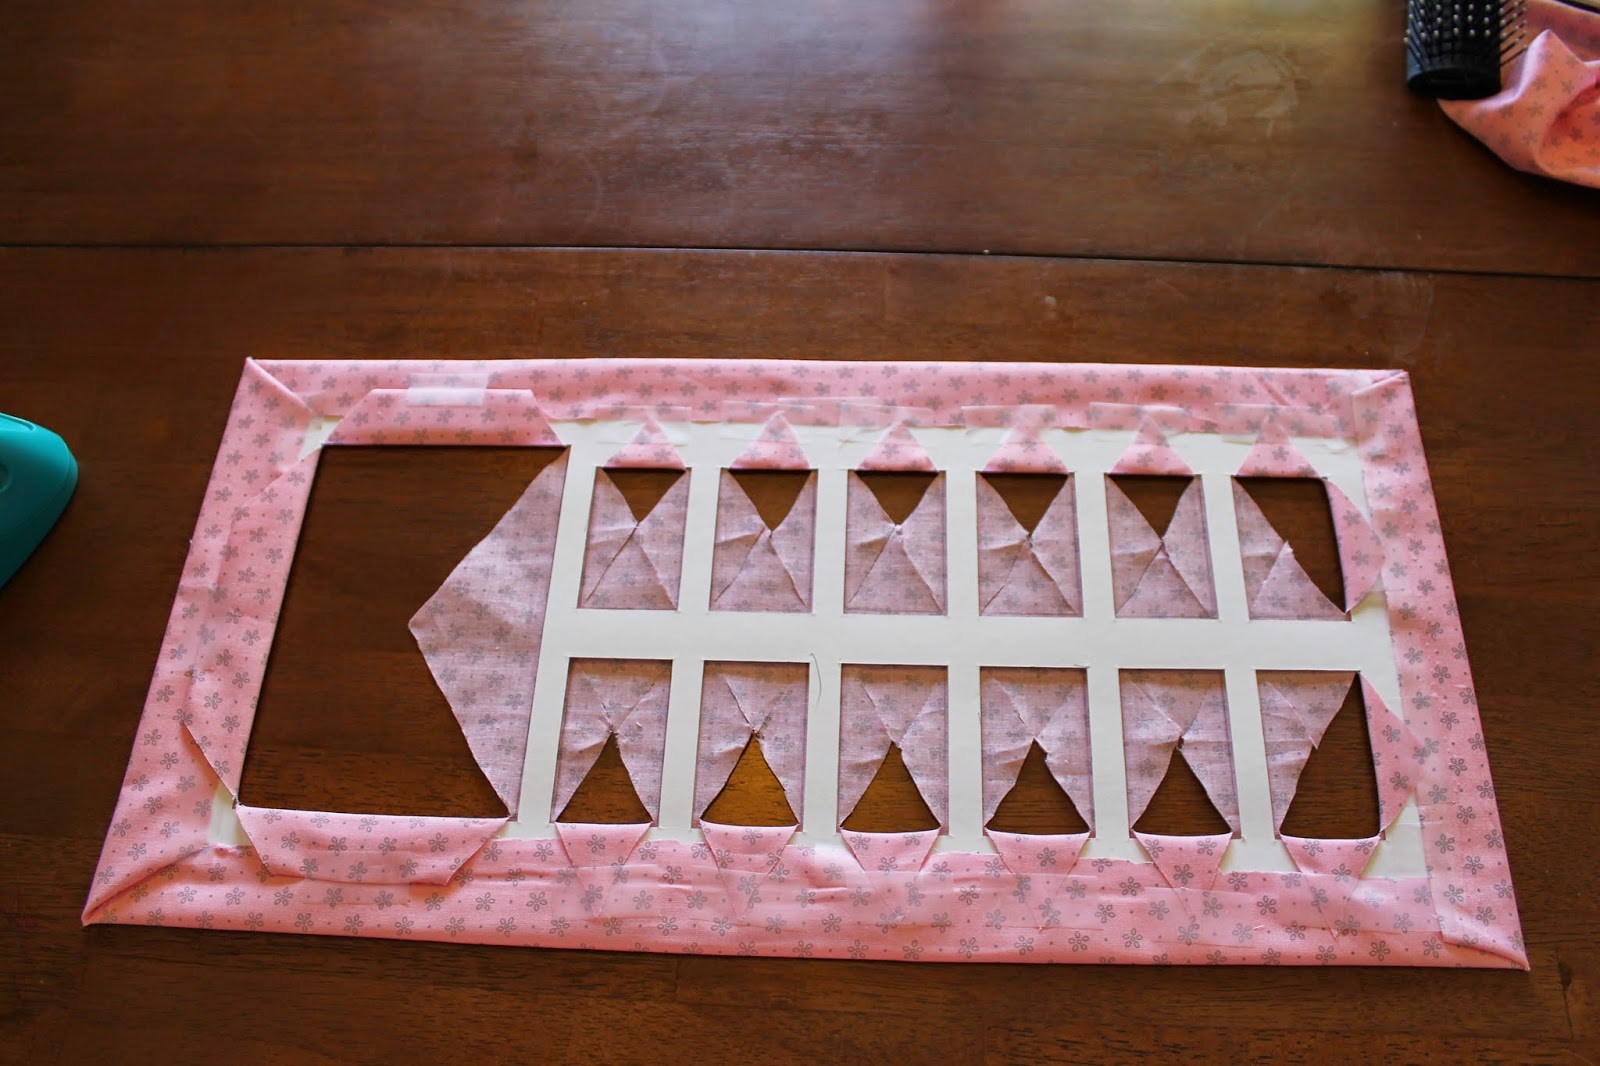
The perimeter is secured!

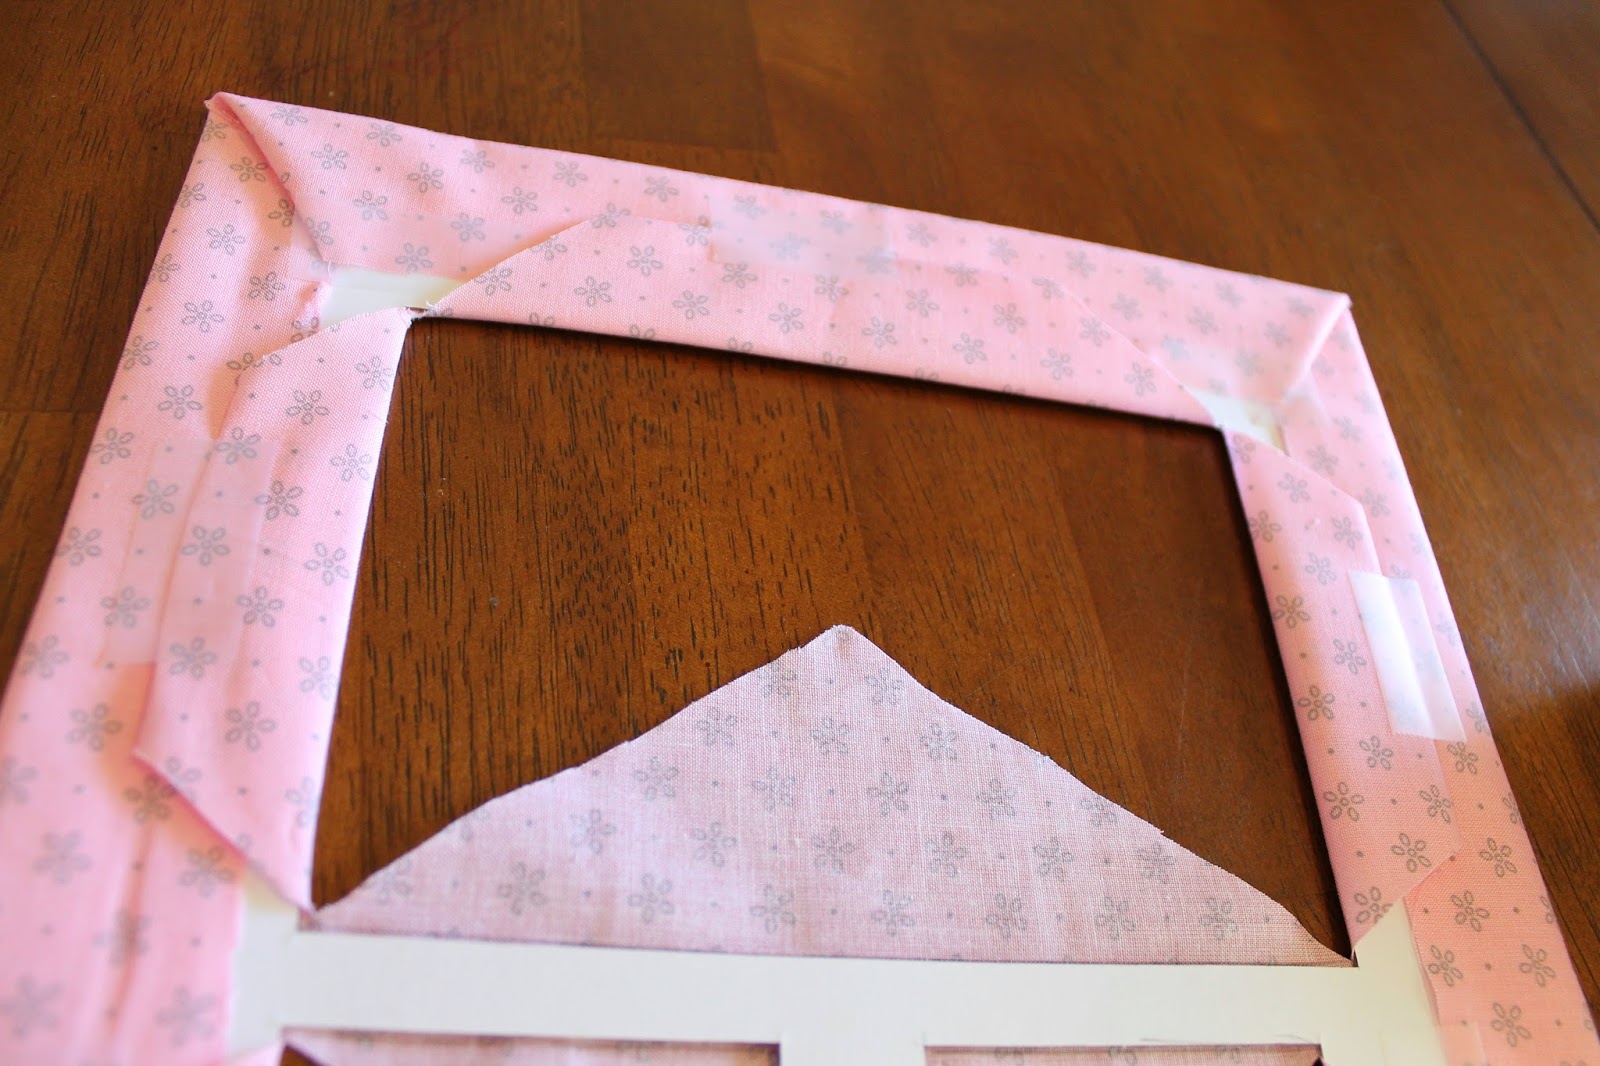
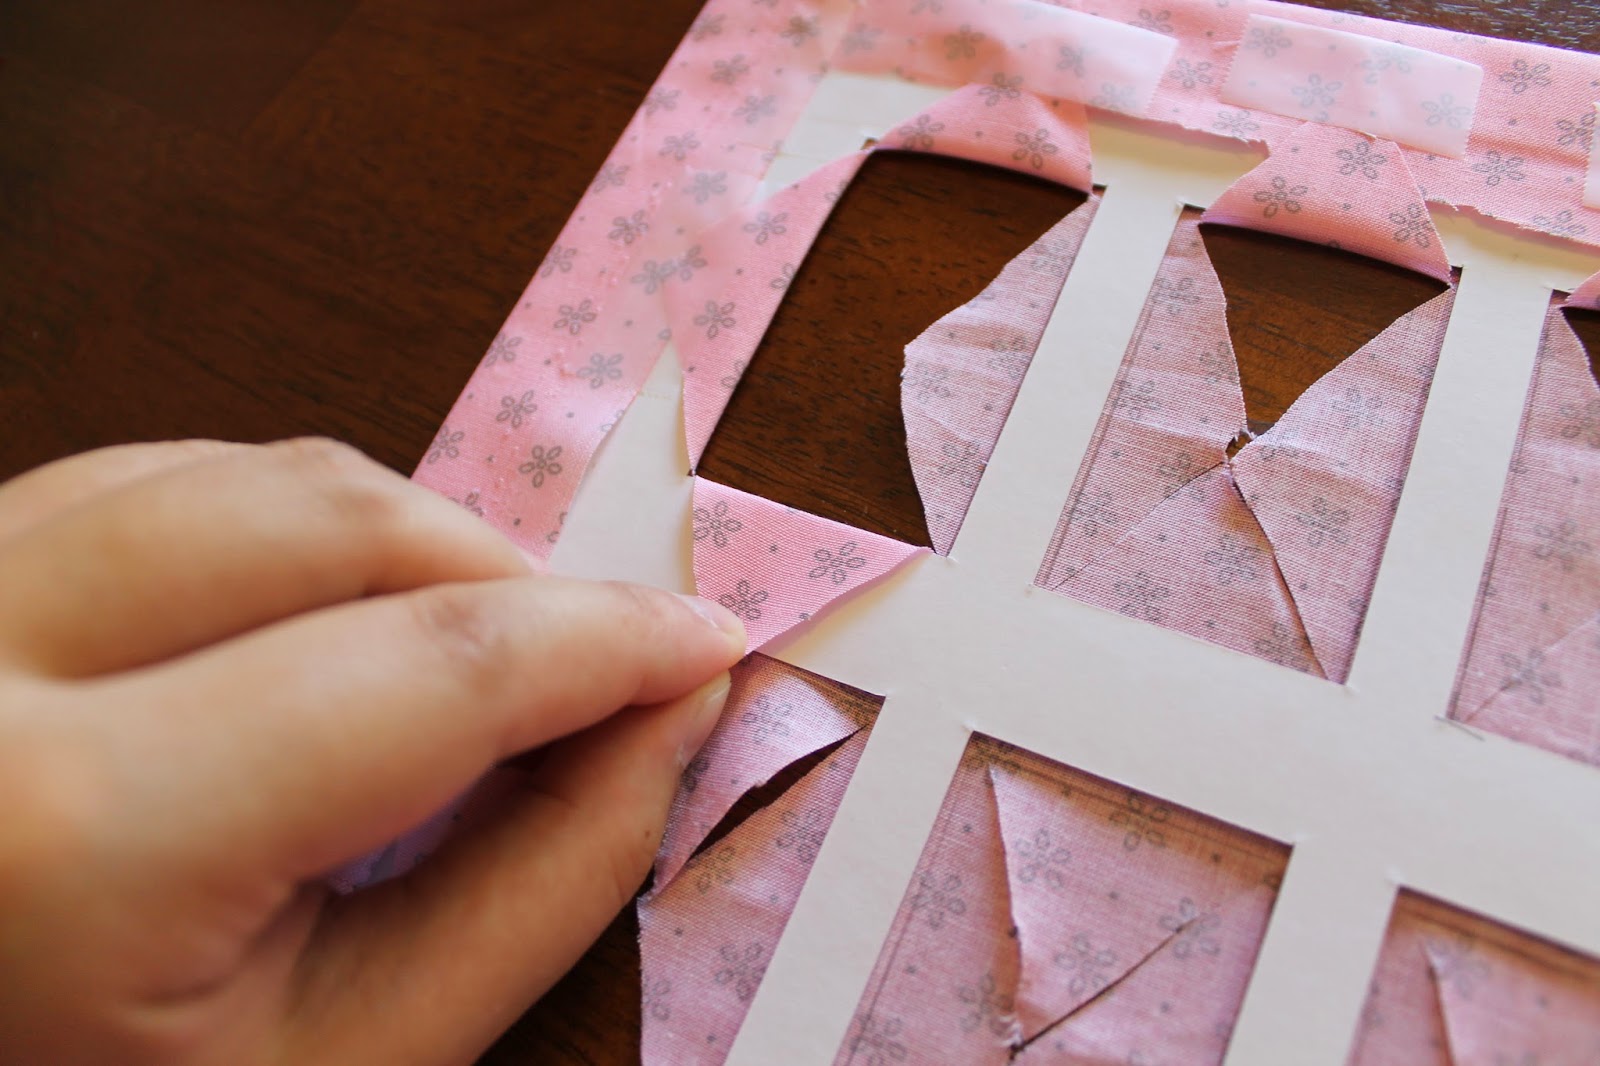
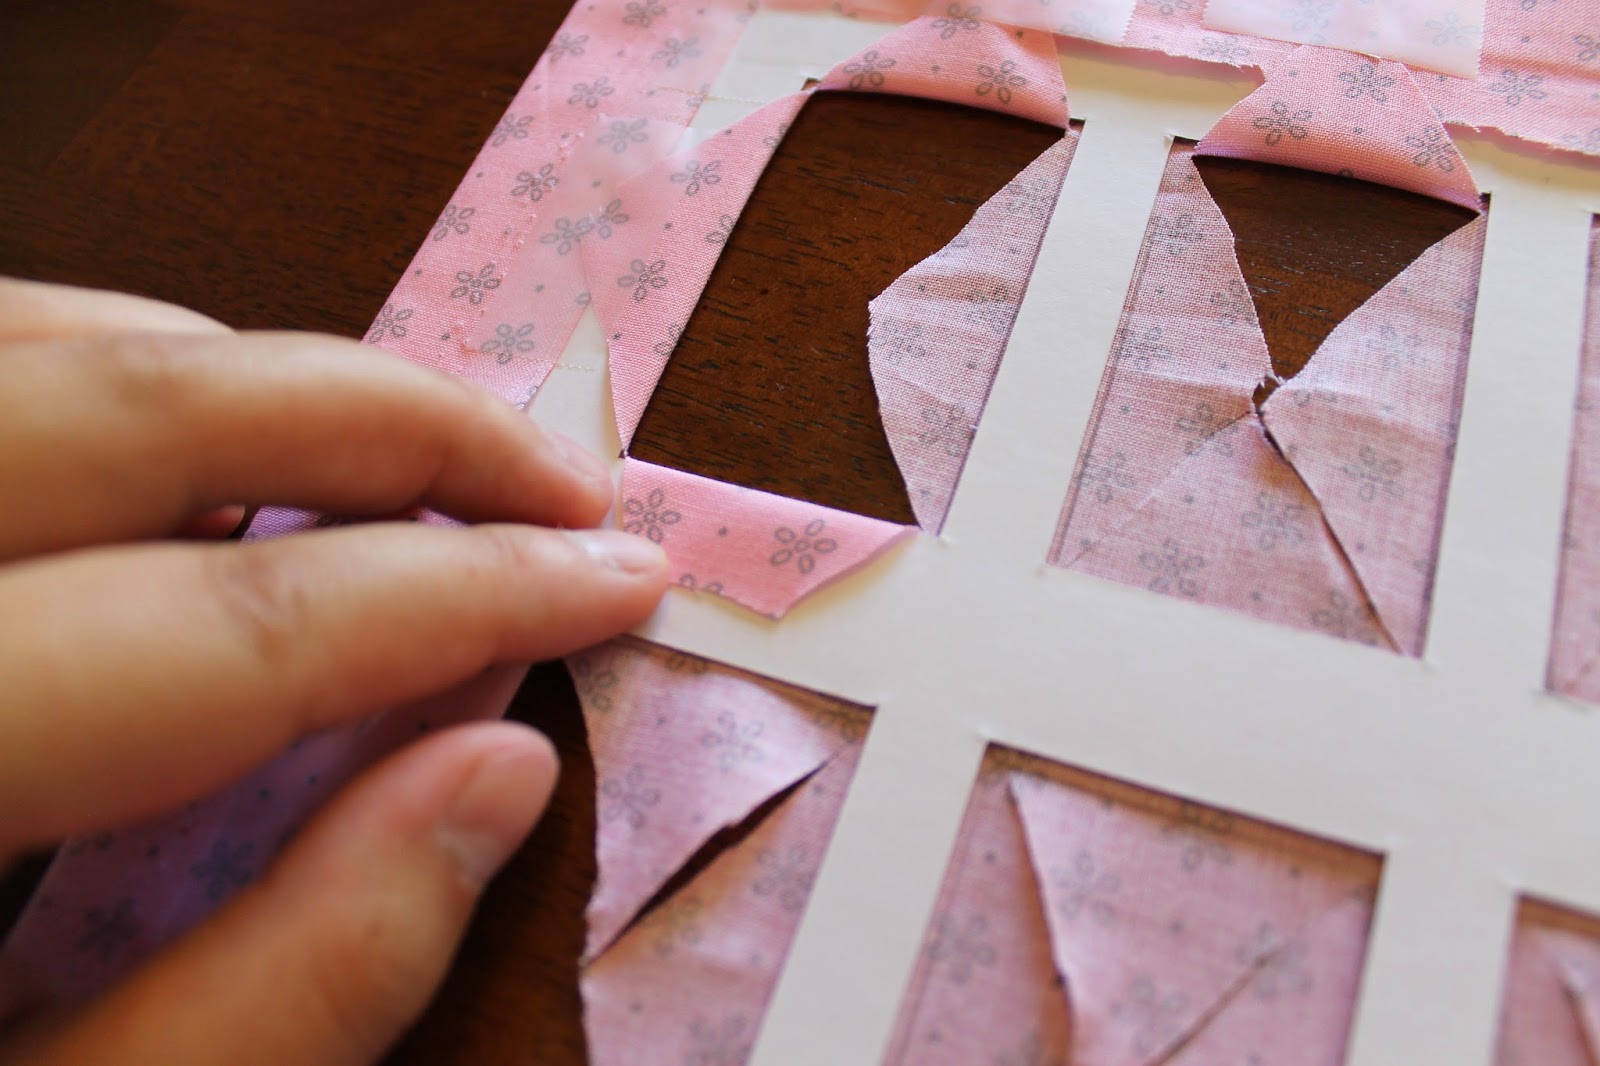
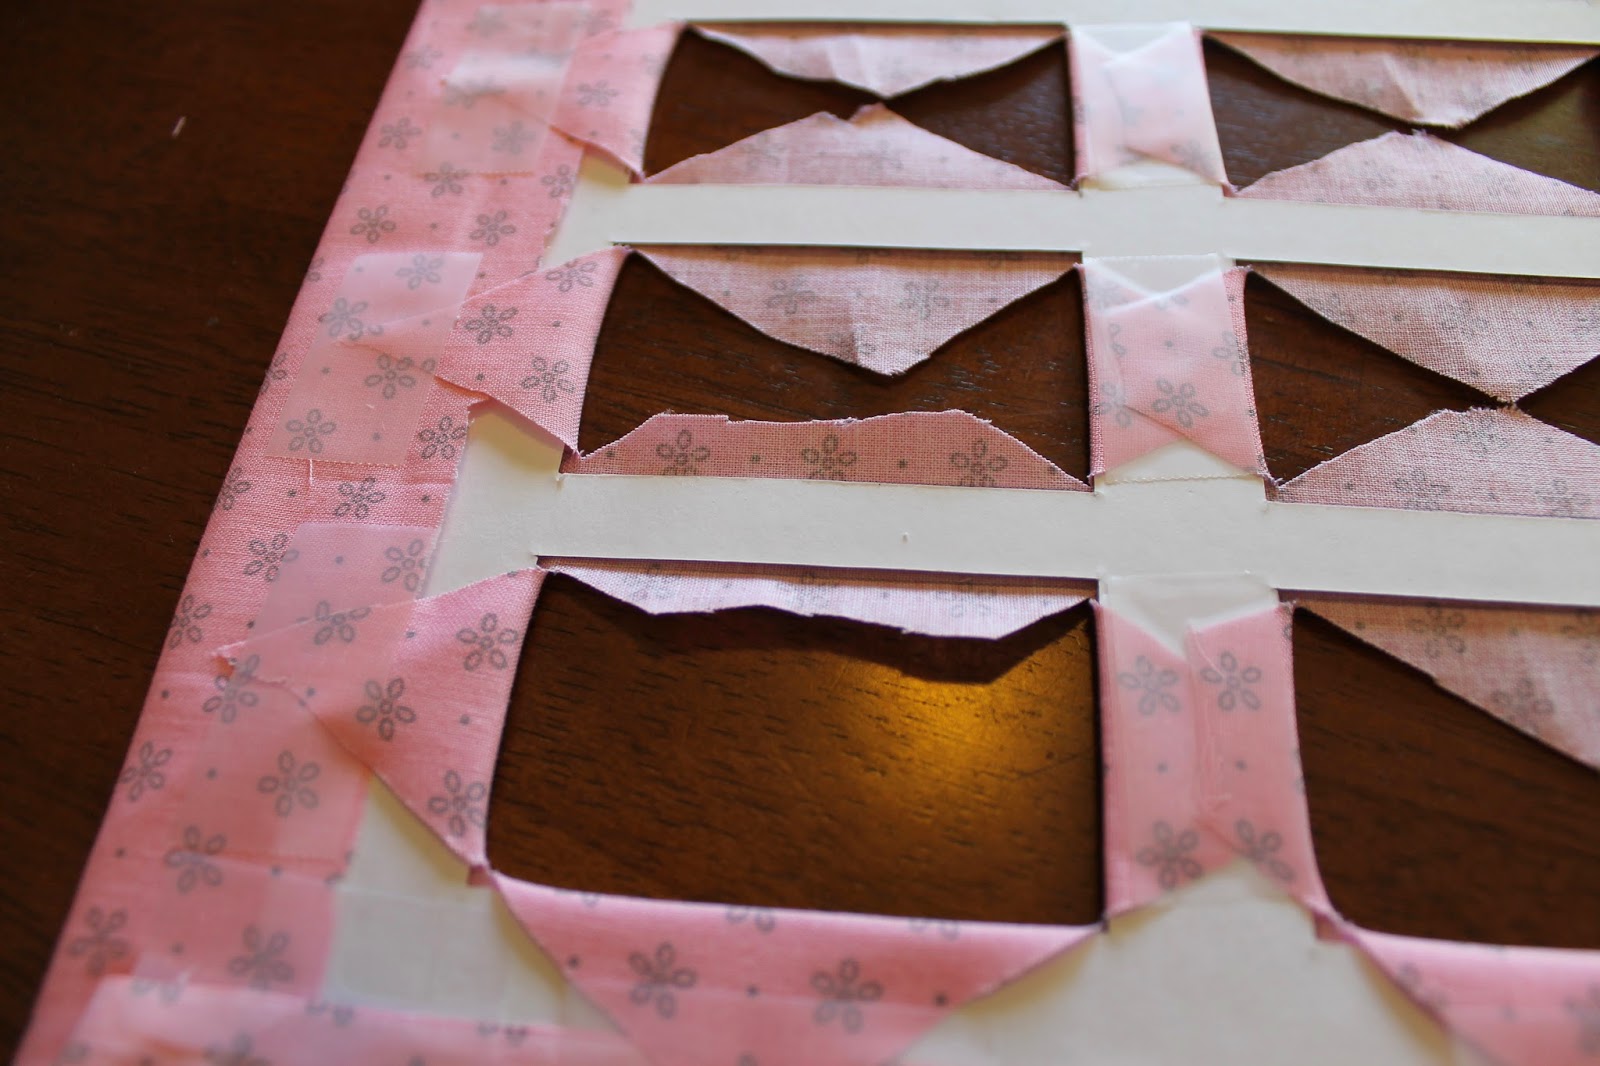
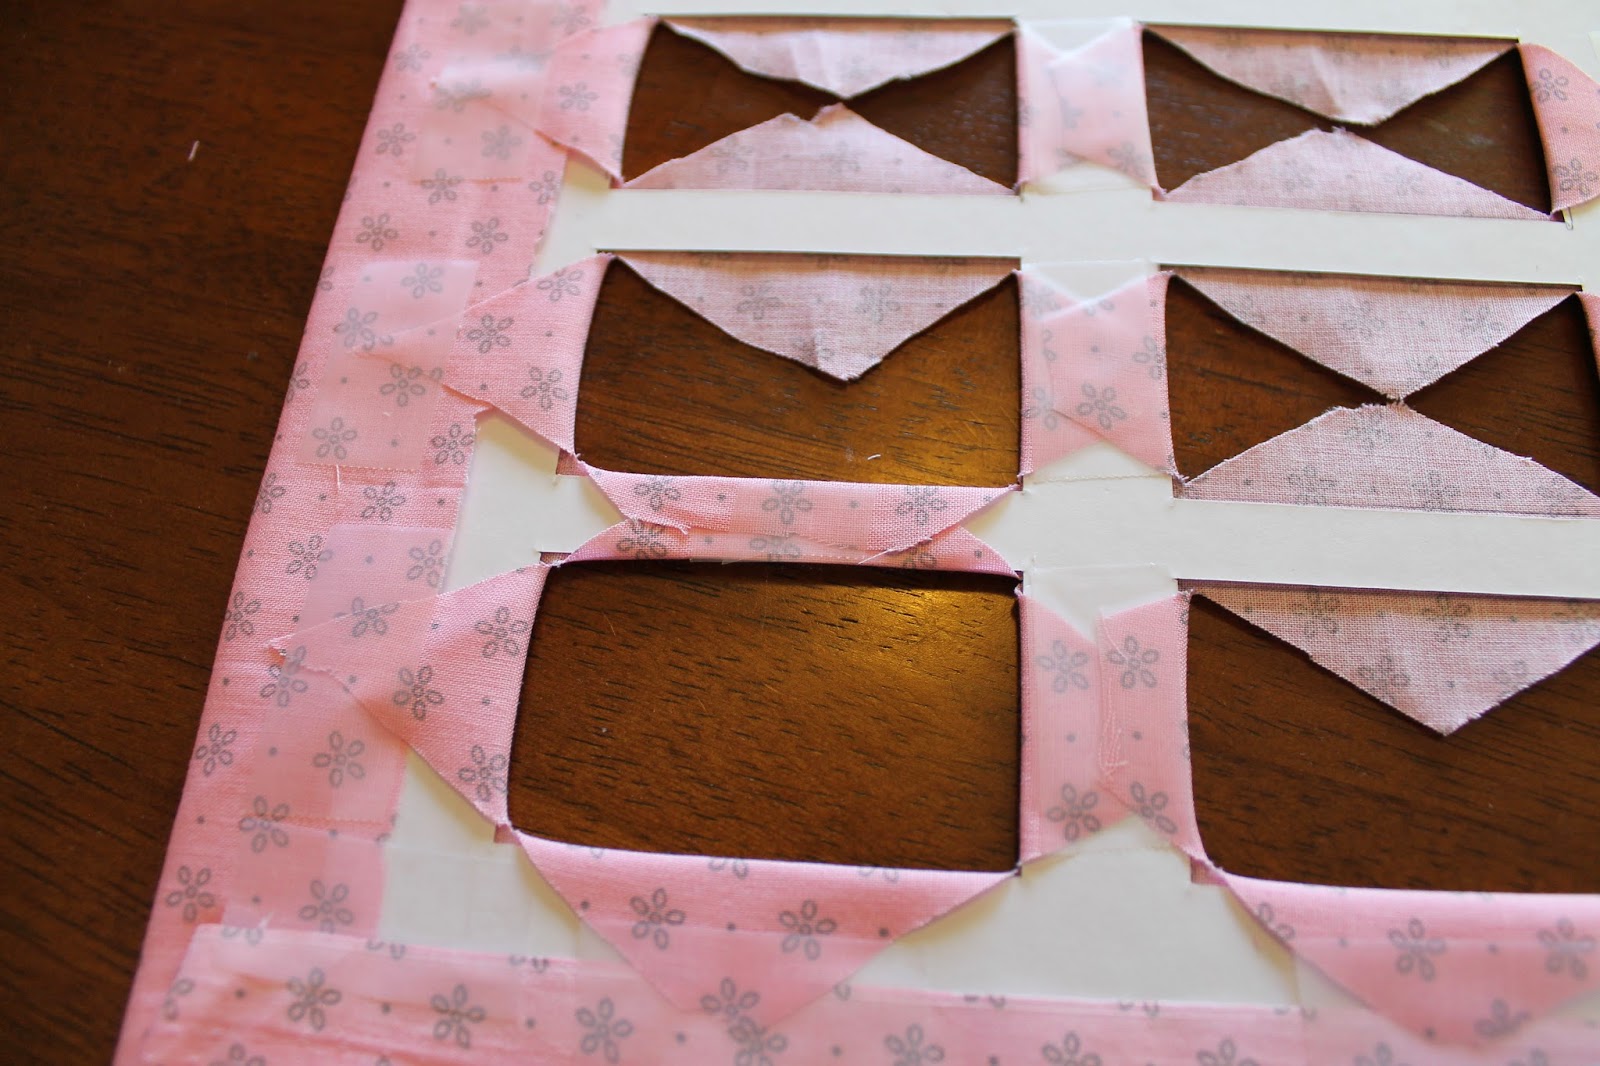
8.  The next part is time consuming, you have been forewarned!! Fold over the triangles and cut off the portions that hang over. Erg, this is better seen than said. Pictures!

Fold over the triangles

Snip the part that hangs over. Leave enough to secure down with tape!

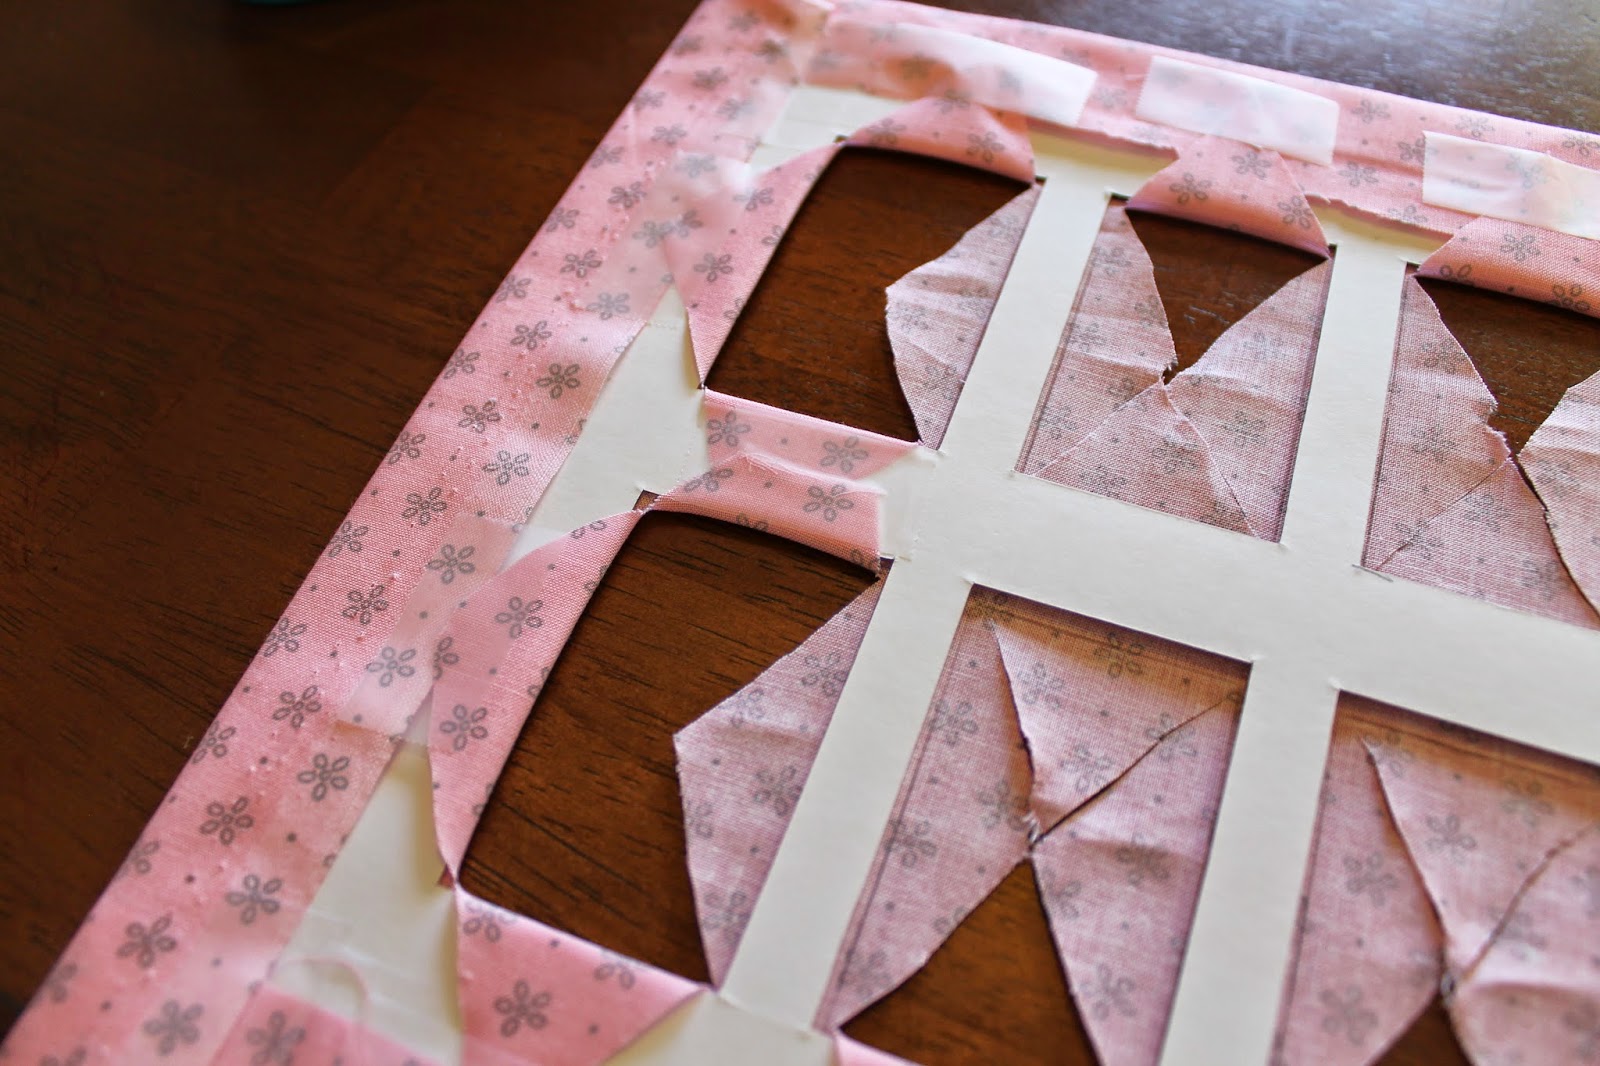
Do it to both sides and tape down.
Make sure the tape doesn't hang over into the actual frame.
You'll be able to see it from the outside.

Repeat for all sides.

One square down! 11 more to go~!

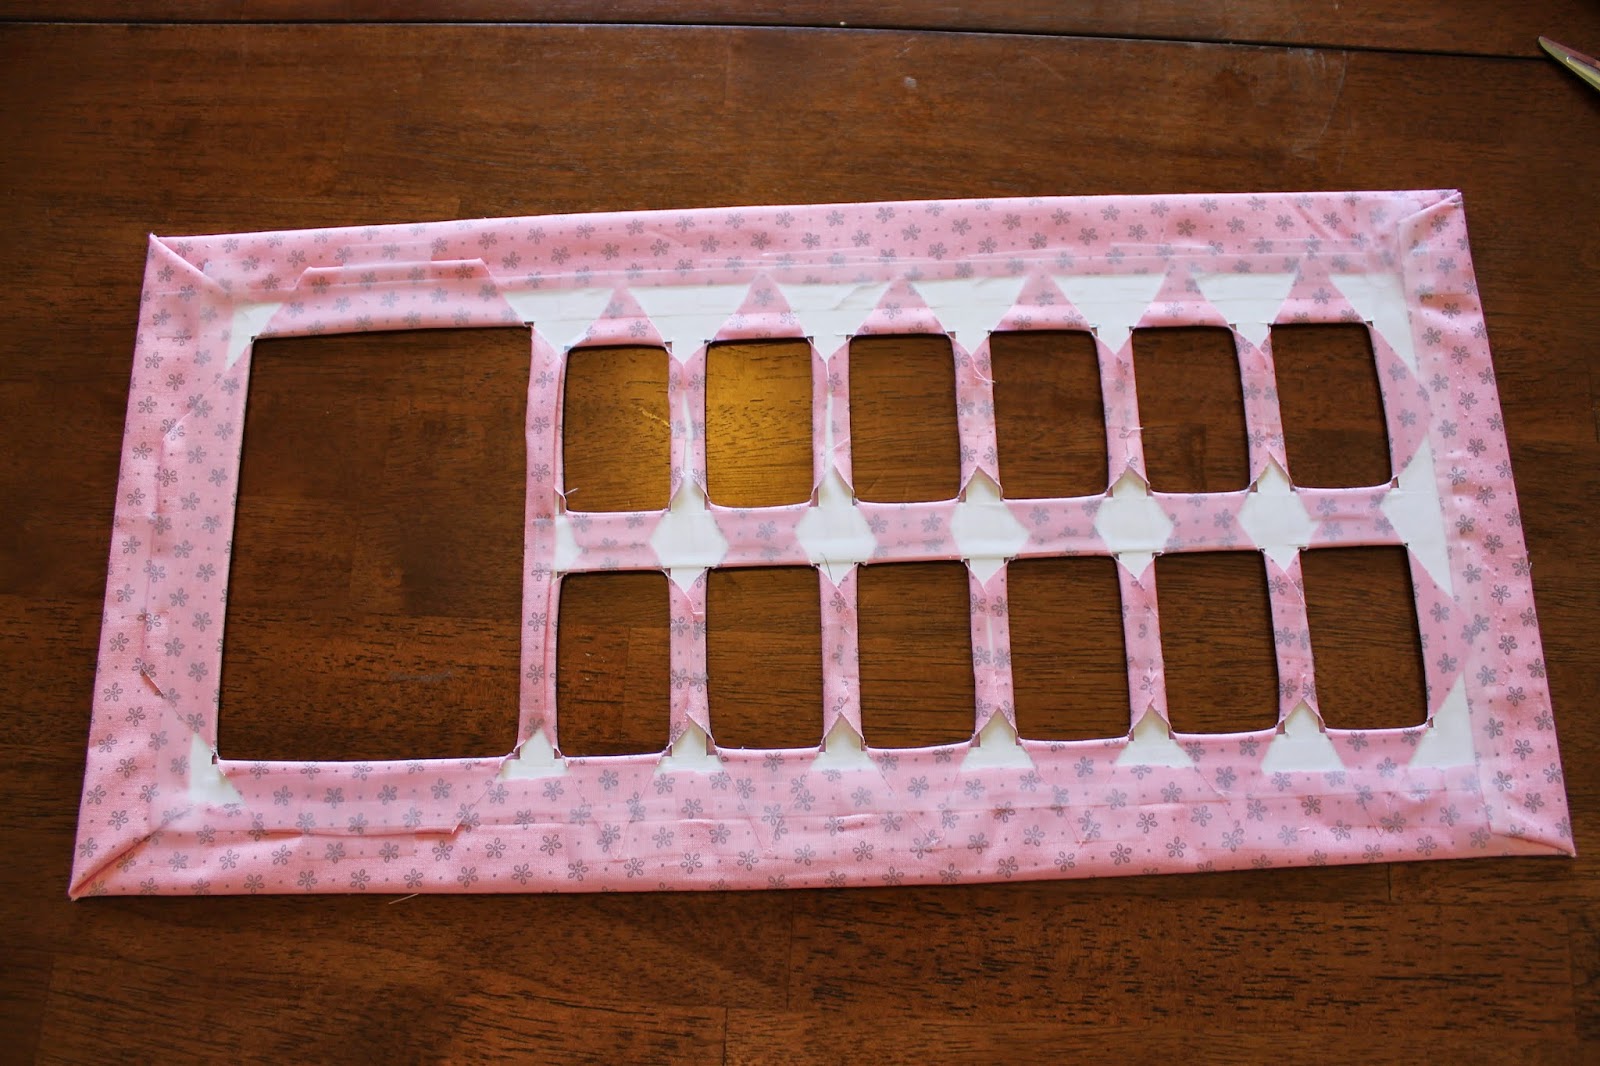
9. The finished taped down product!!


I ended up adding extra long strips of tape for some extra security.
 
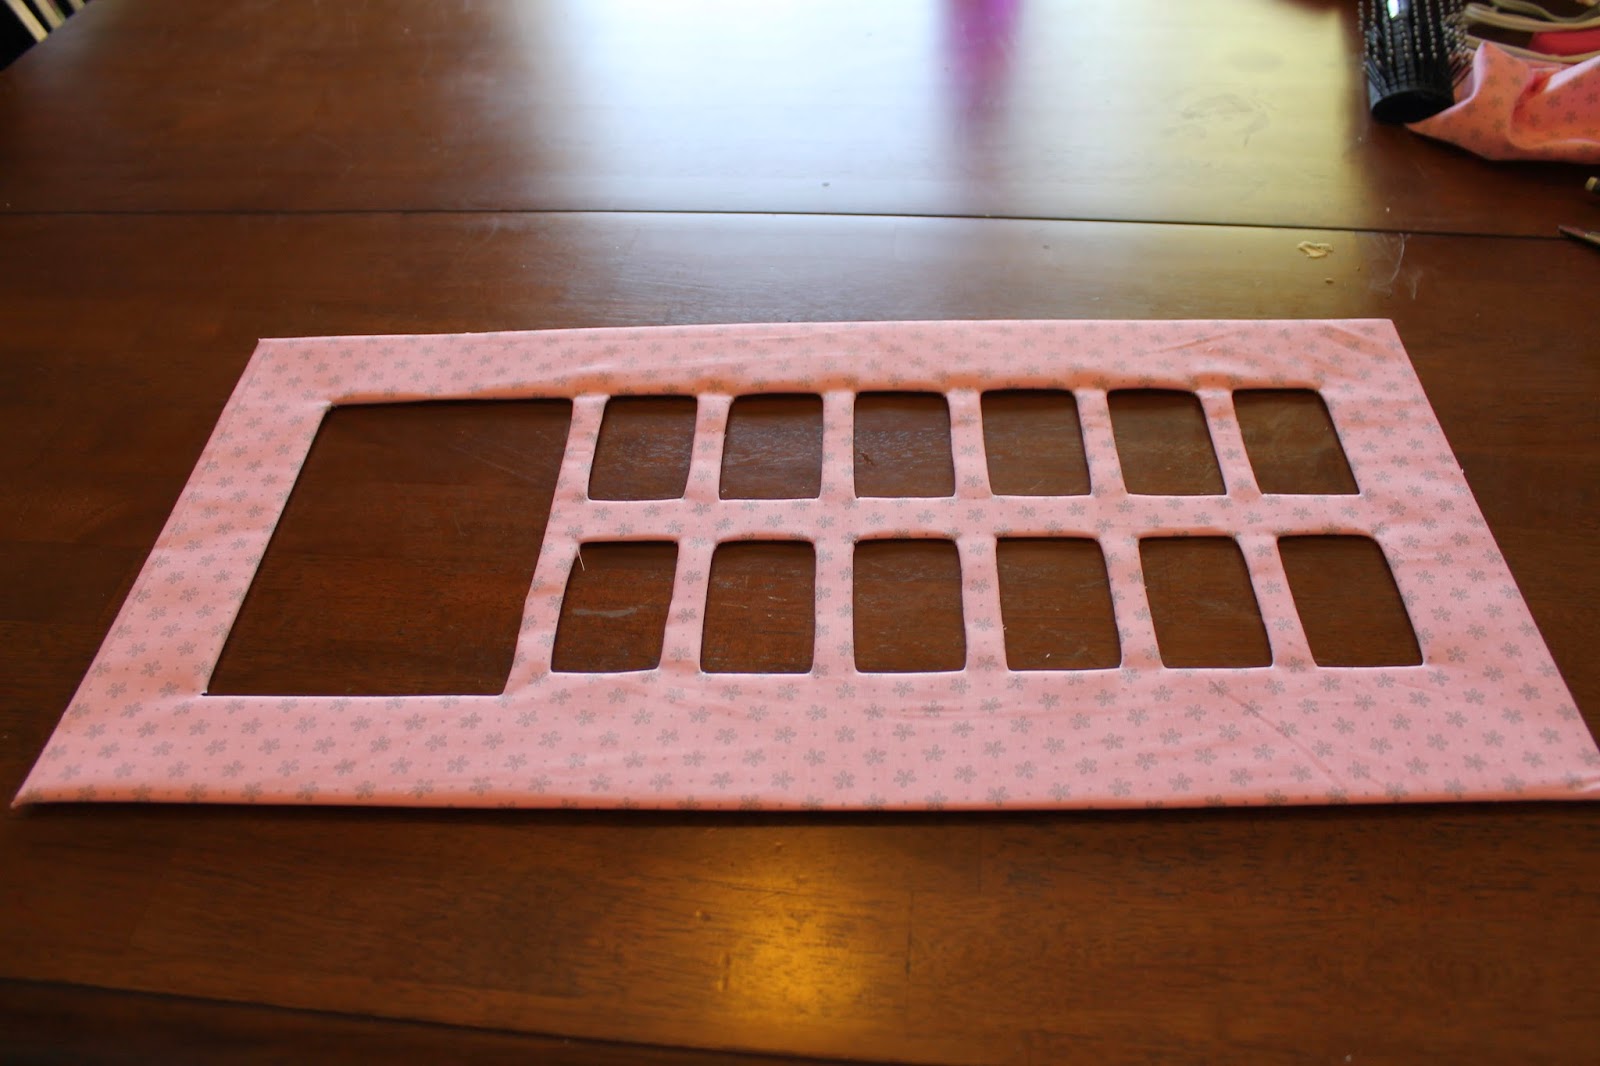
The mat is now customized and adorable!

10. Put the covered mat into the frame! Now baby needs to pop so I can start putting in pictures!